
Lab H - Policy as Code
Goals
See how easy it is with Harness to create and apply policies as code in order to enable governance and promote self-service.
Lab Guide
- If you see the edit pipeline button top right, click to return to the Pipeline Studio.
Implement policy from library
-
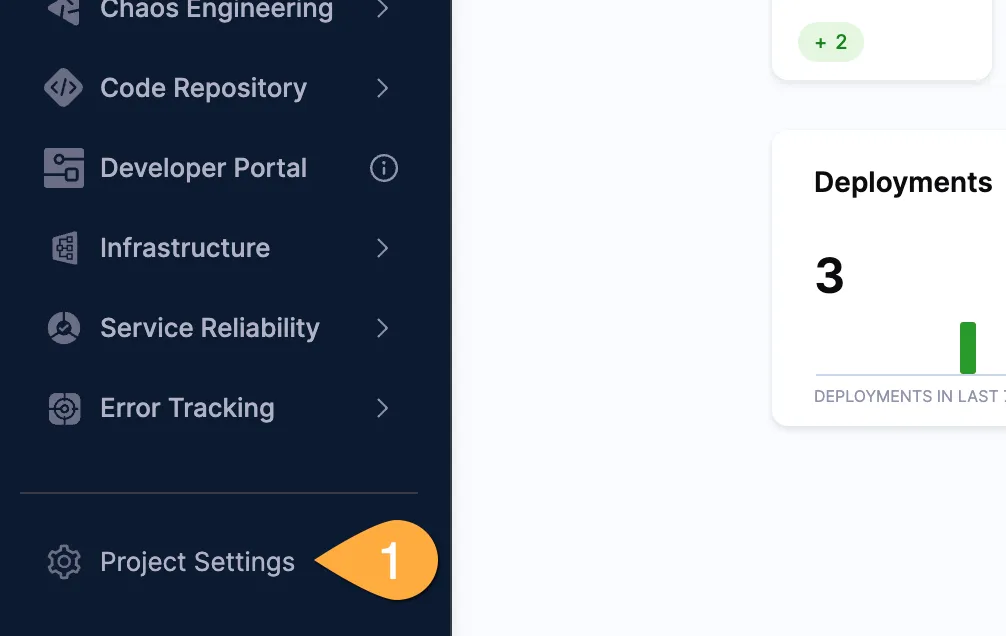
On the left menu, 1 click Project Settings (you might need to scroll down)
-
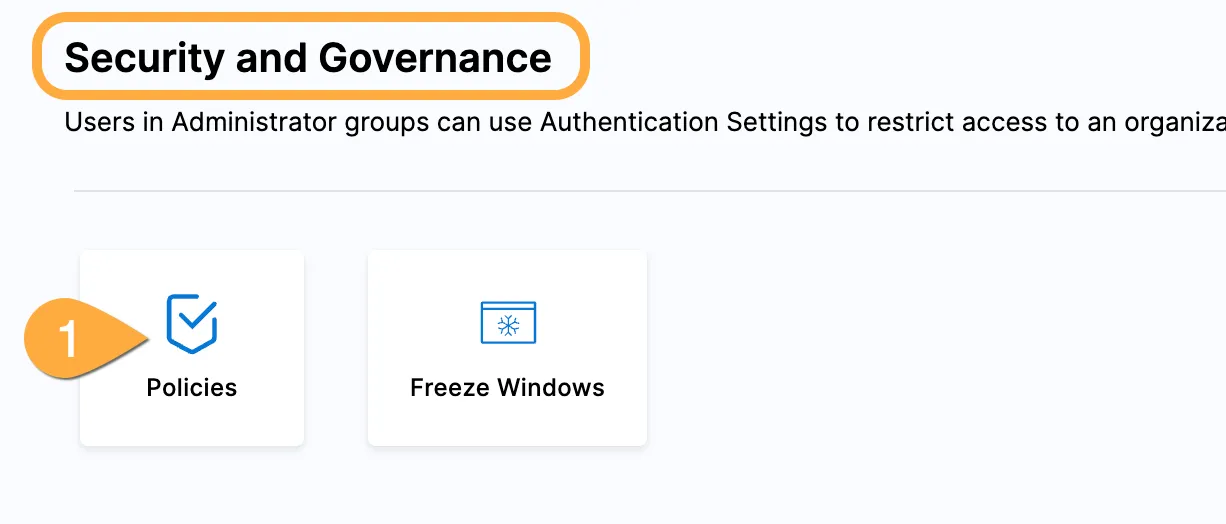
In project settings, scroll down to Security and Governance and 1 click Policies
-
In the Welcome screen: click Build a Sample Policy
-
In the Policy pane: 1 (optional) type
approval, 2 click Pipeline Approval, 3 click Next: Test Policy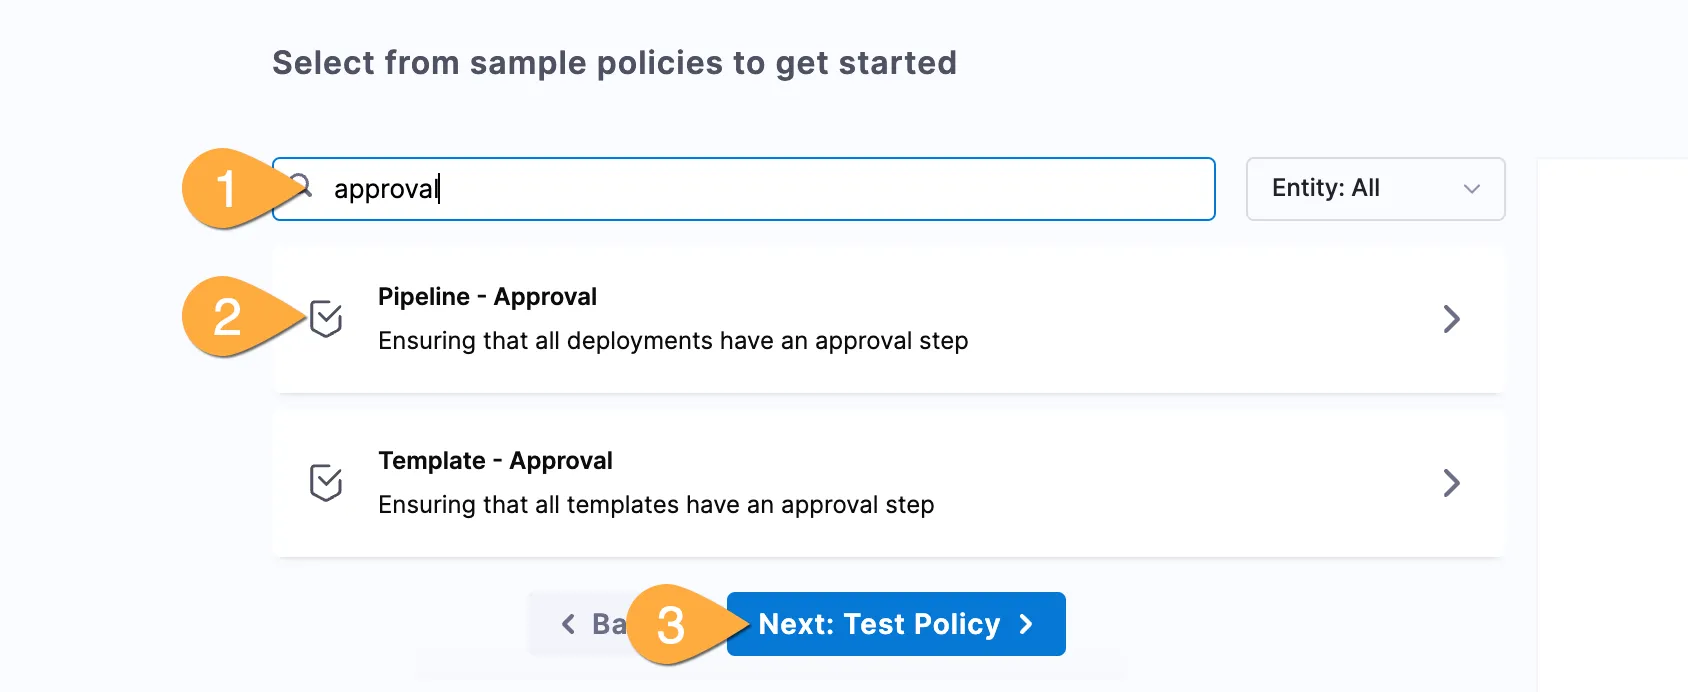
-
In the Test Policy pane: click Next: Enforce Policy
-
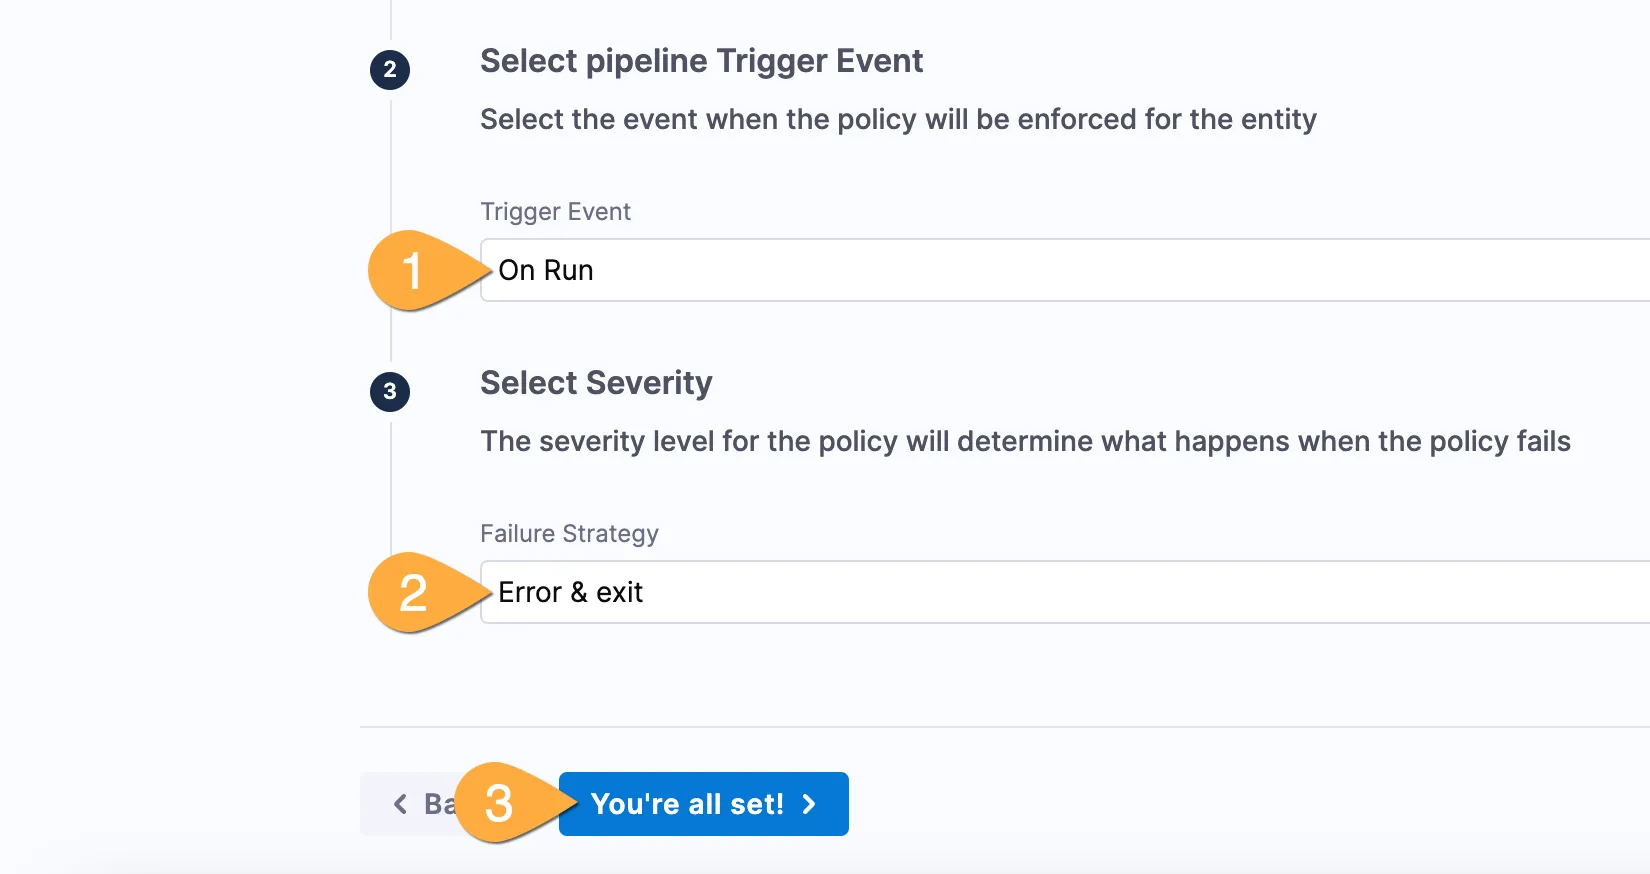
In the Enforce Policy pane: 1 In Trigger event, choose On Run, 2 In Failure Strategy, choose Error & exit, 3 click You’re all set!
-
In the Apply Policy? pop-up: click Yes
Test your new policy!
-
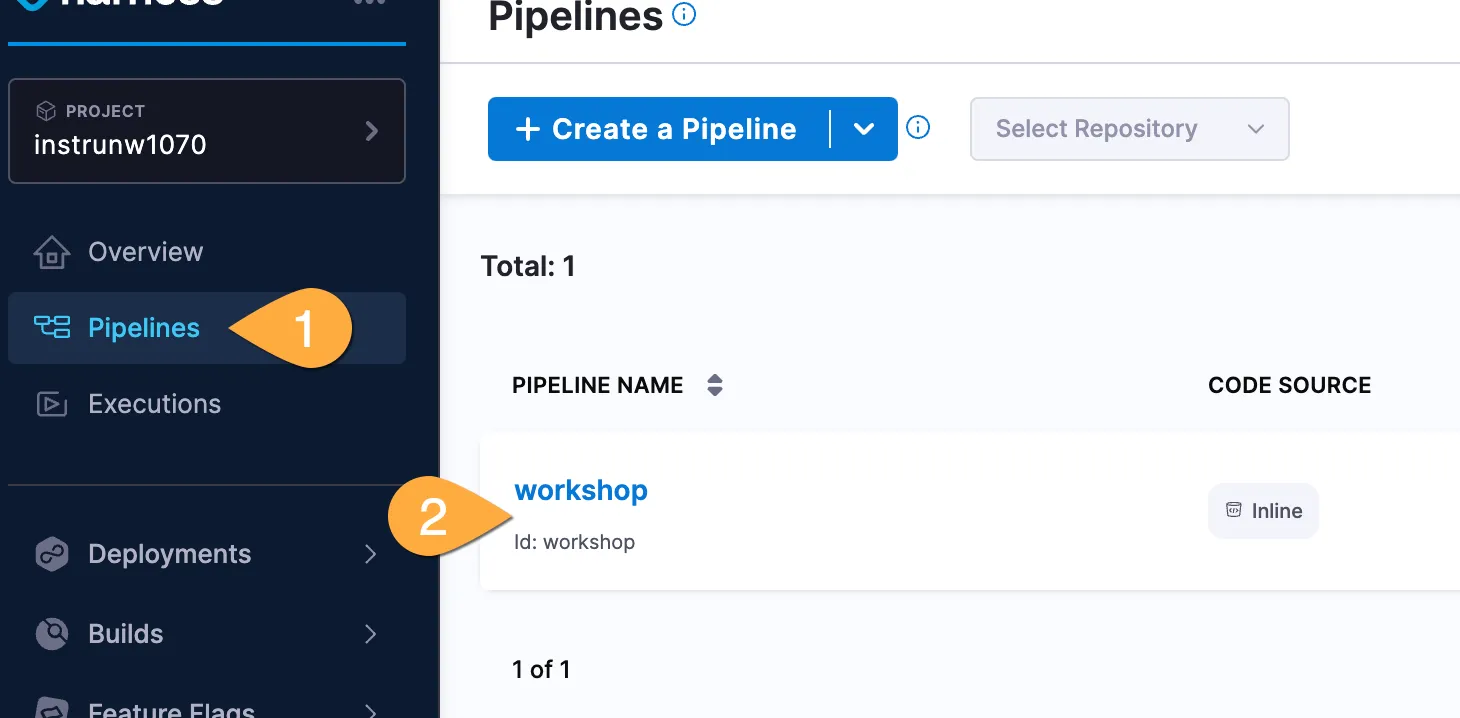
Return to your pipeline by: 1 Click Pipelines in the left menu (might need to scroll up), 2 click the Workshop pipeline
-
In the top right corner of your pipeline: click Run. Confirm you receive an error regarding your policy.
-
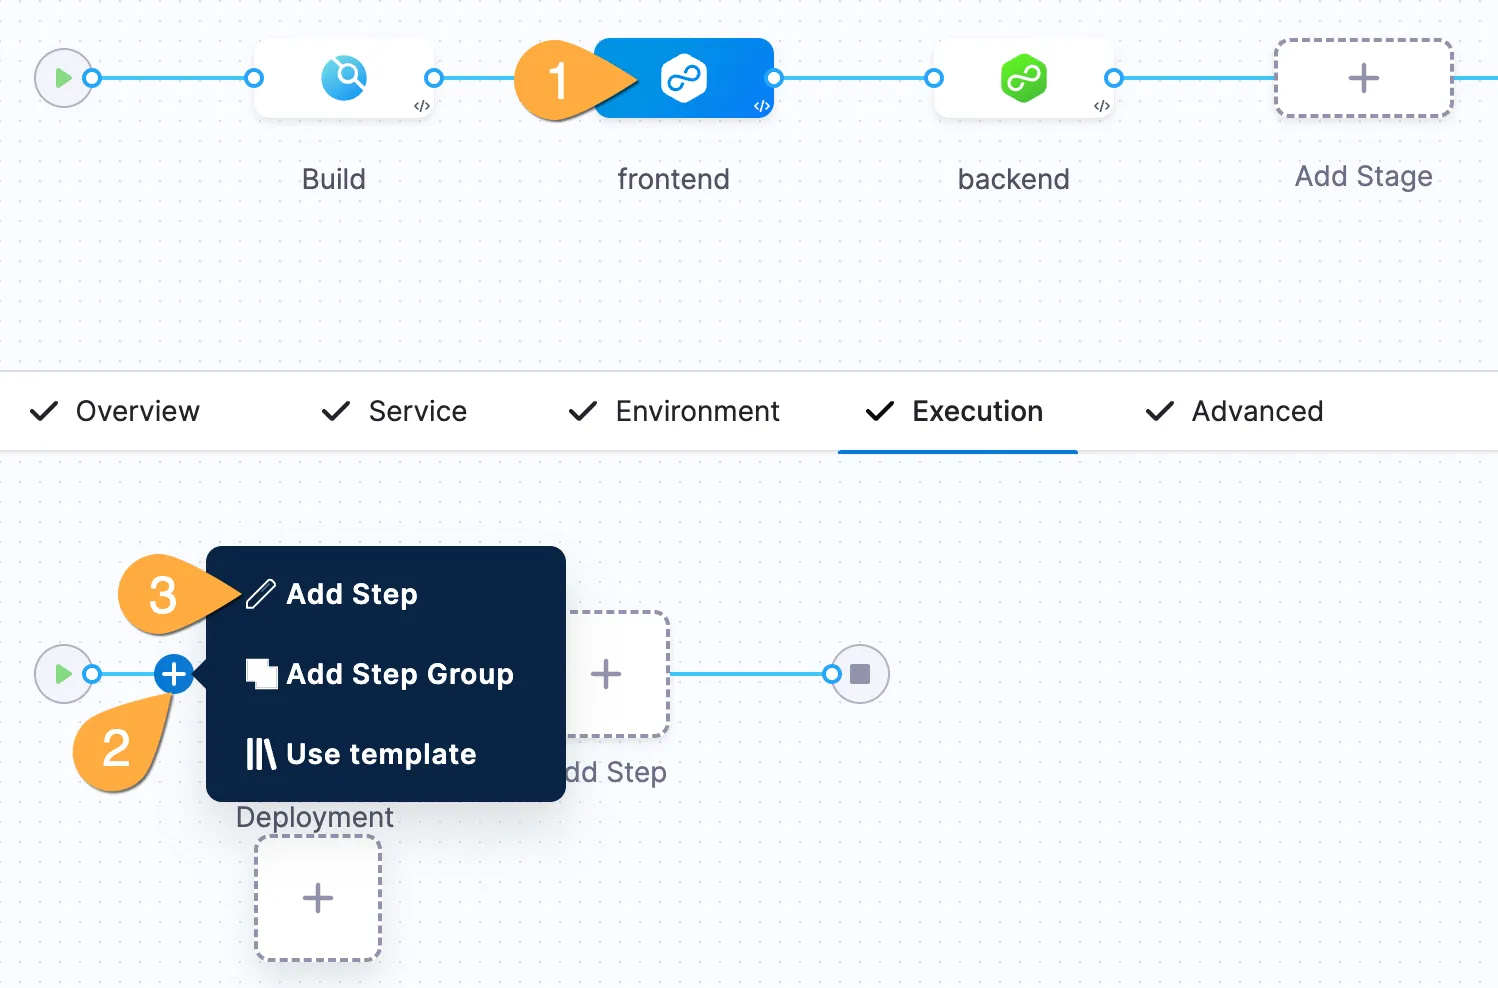
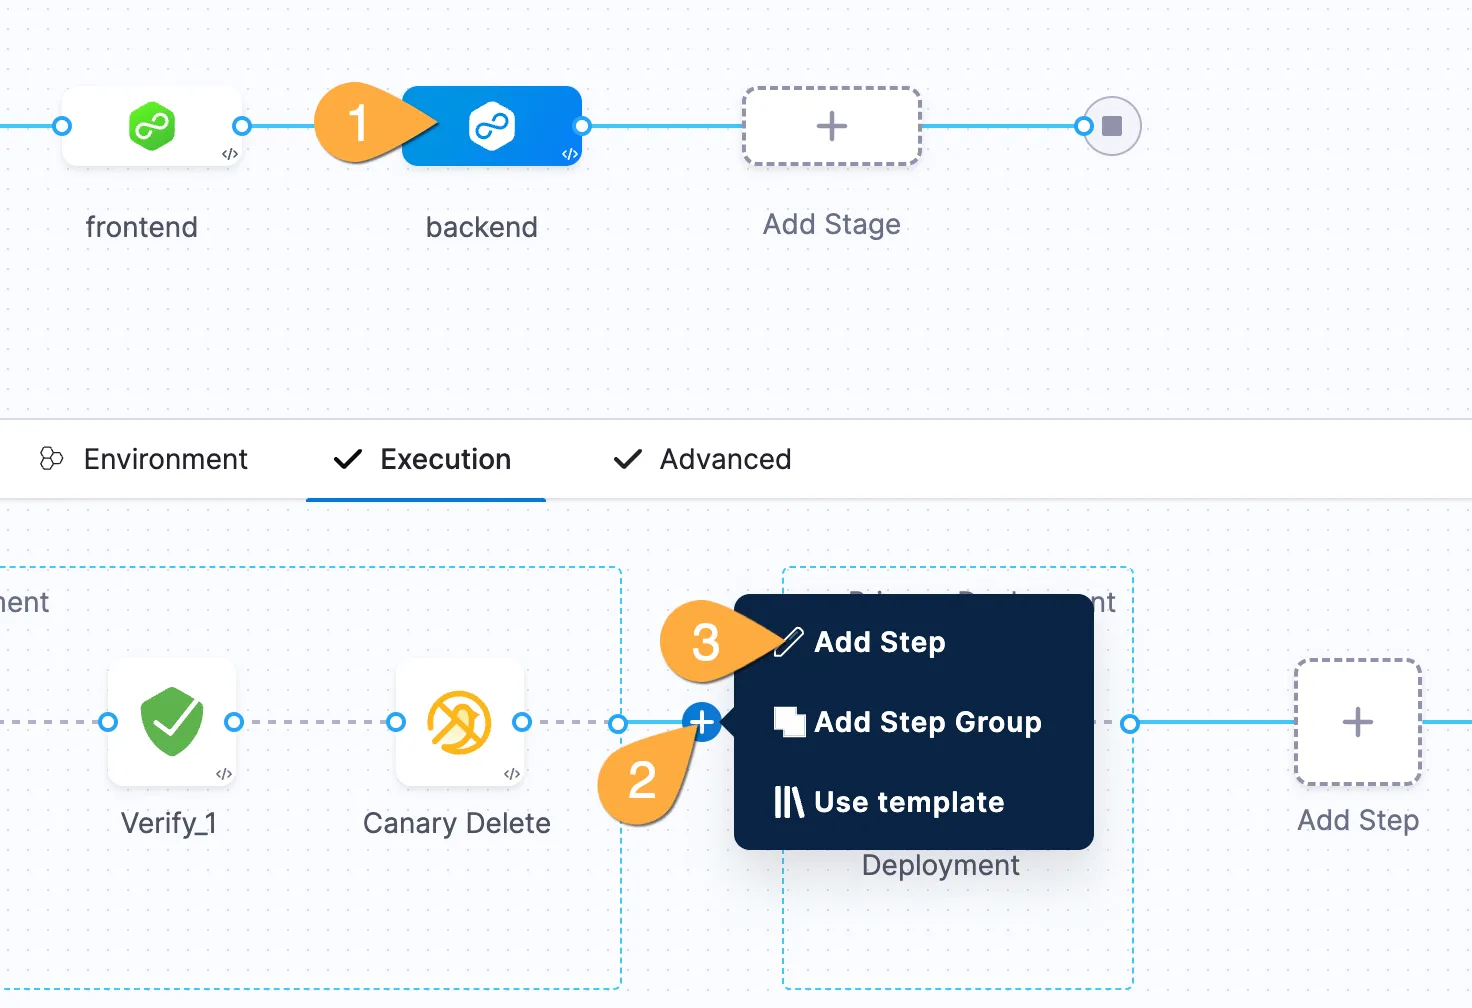
Edit your pipeline: 1 Click on frontend stage, 2 at very beginning stage, hover then click on blue arrow, click Add Step
-
In the Step Library, (optionally) search for
approval, then Click on Harness Approval -
In the Approval step: name the step
Approval, scroll down then 1 Click on User Groups box.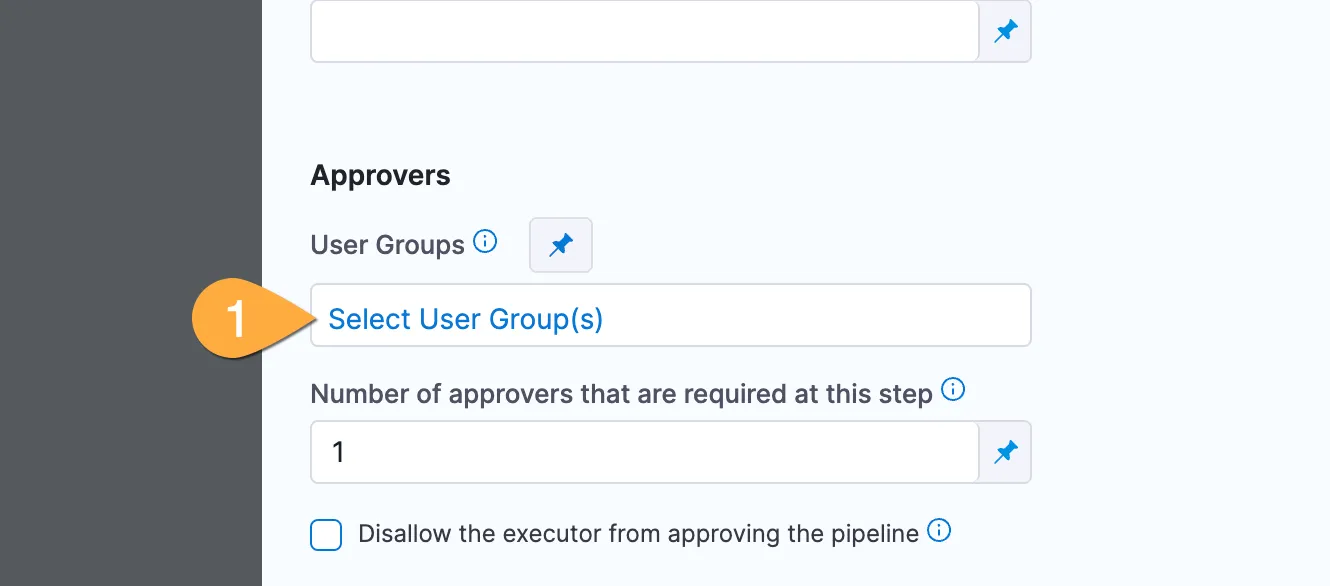
-
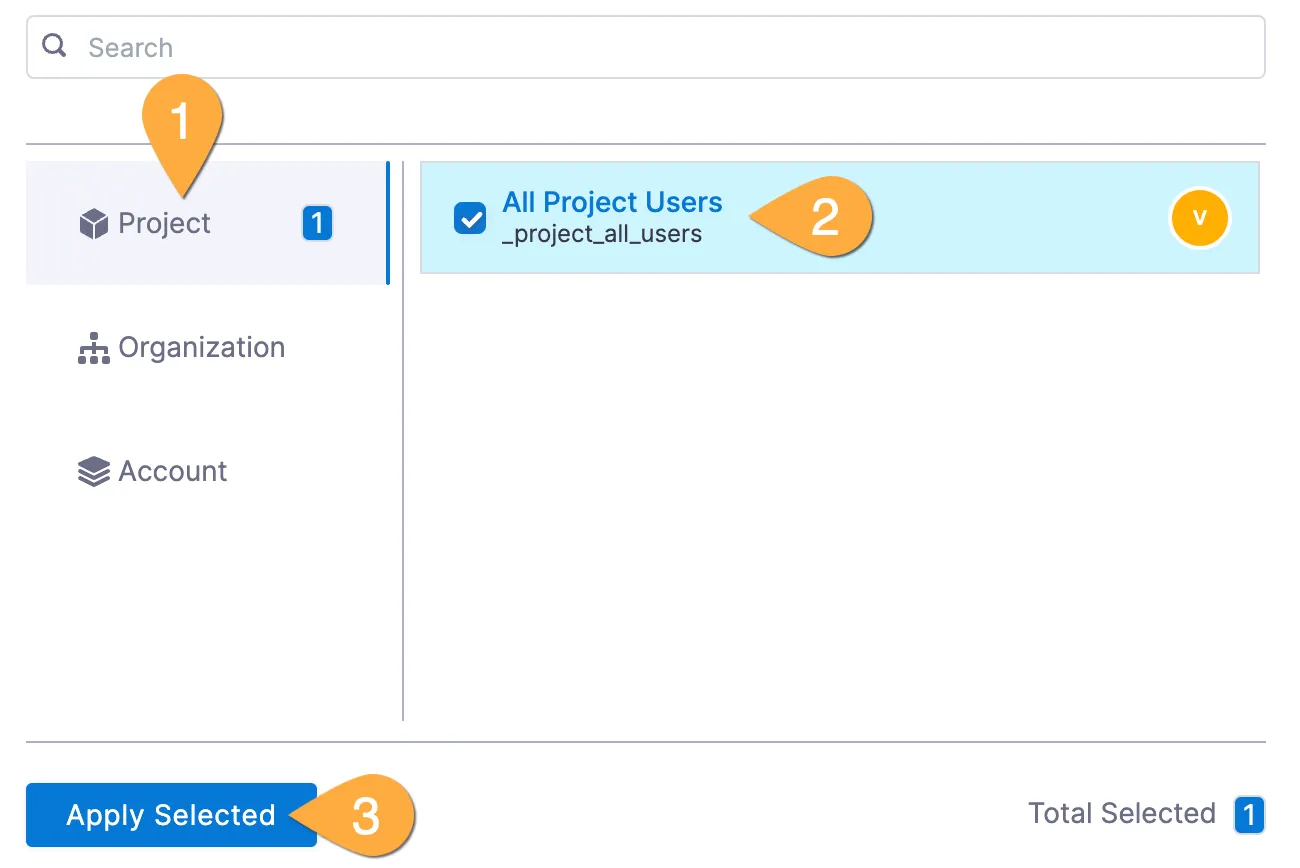
In the user group selector: 1 click on Project, 2 check All Project Users, 3 Click Apply Selected
-
Back in the Approval step: Click Apply Changes (top right)
-
In Pipeline Studio: 1 click backend stage, after canary/before rolling release hover then click on blue arrow, click Add Step
-
Same as above, add Approval step in the library, scroll to user groups, and add all project users.
Run your successful pipeline one final time
-
In the top right of screen, click Save, then click Run.