Lab G - Continous Verification
Goals
Add Continuous Verification to the pipeline to automate the validation of new releases.
Lab Guide
- If you see the edit pipeline button top right, click to return to the Pipeline Studio.
Add Continuous Verification
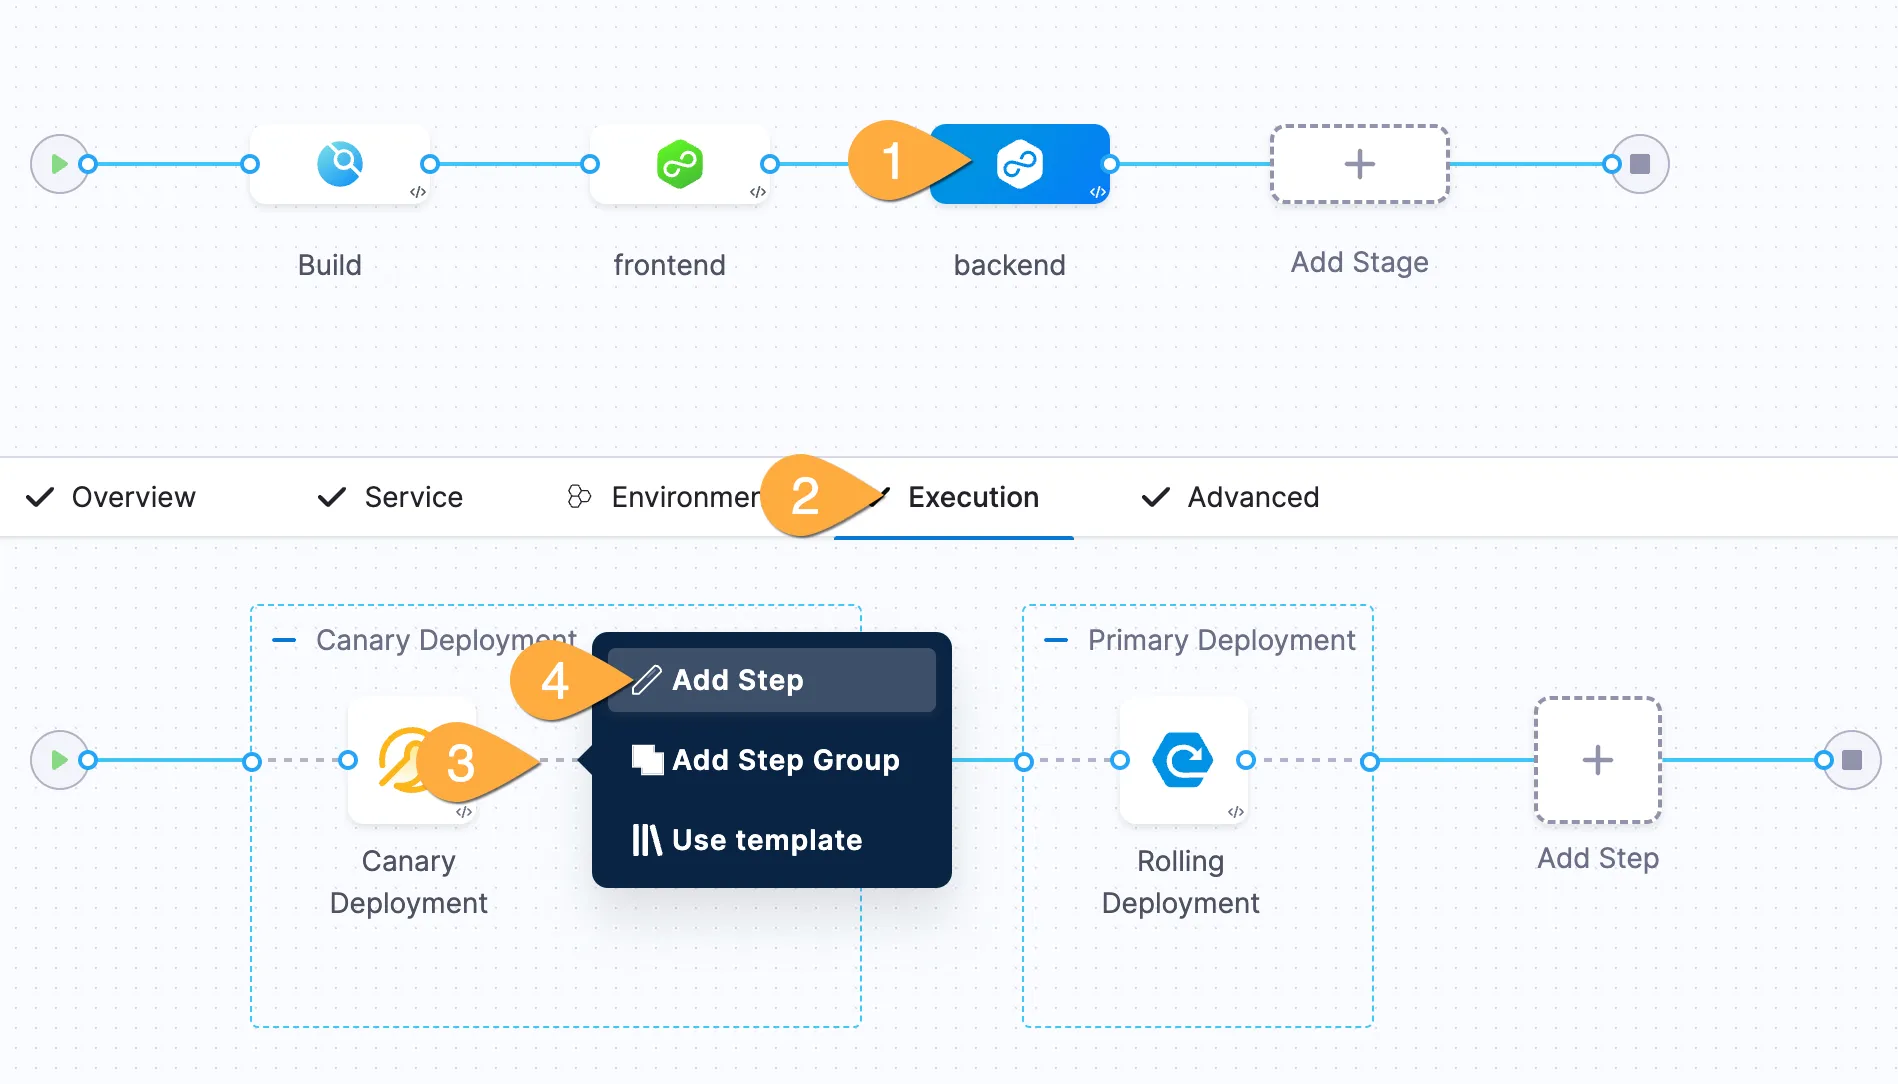
- In Pipeline Studio: 1 click Backend stage, 2 ensure Execution is selected, 3 hover and click the little blue plus between canary deploy and delete, 4 click Add Step

- In the Step Library, (optionally) type verify in the search box, click Verify.
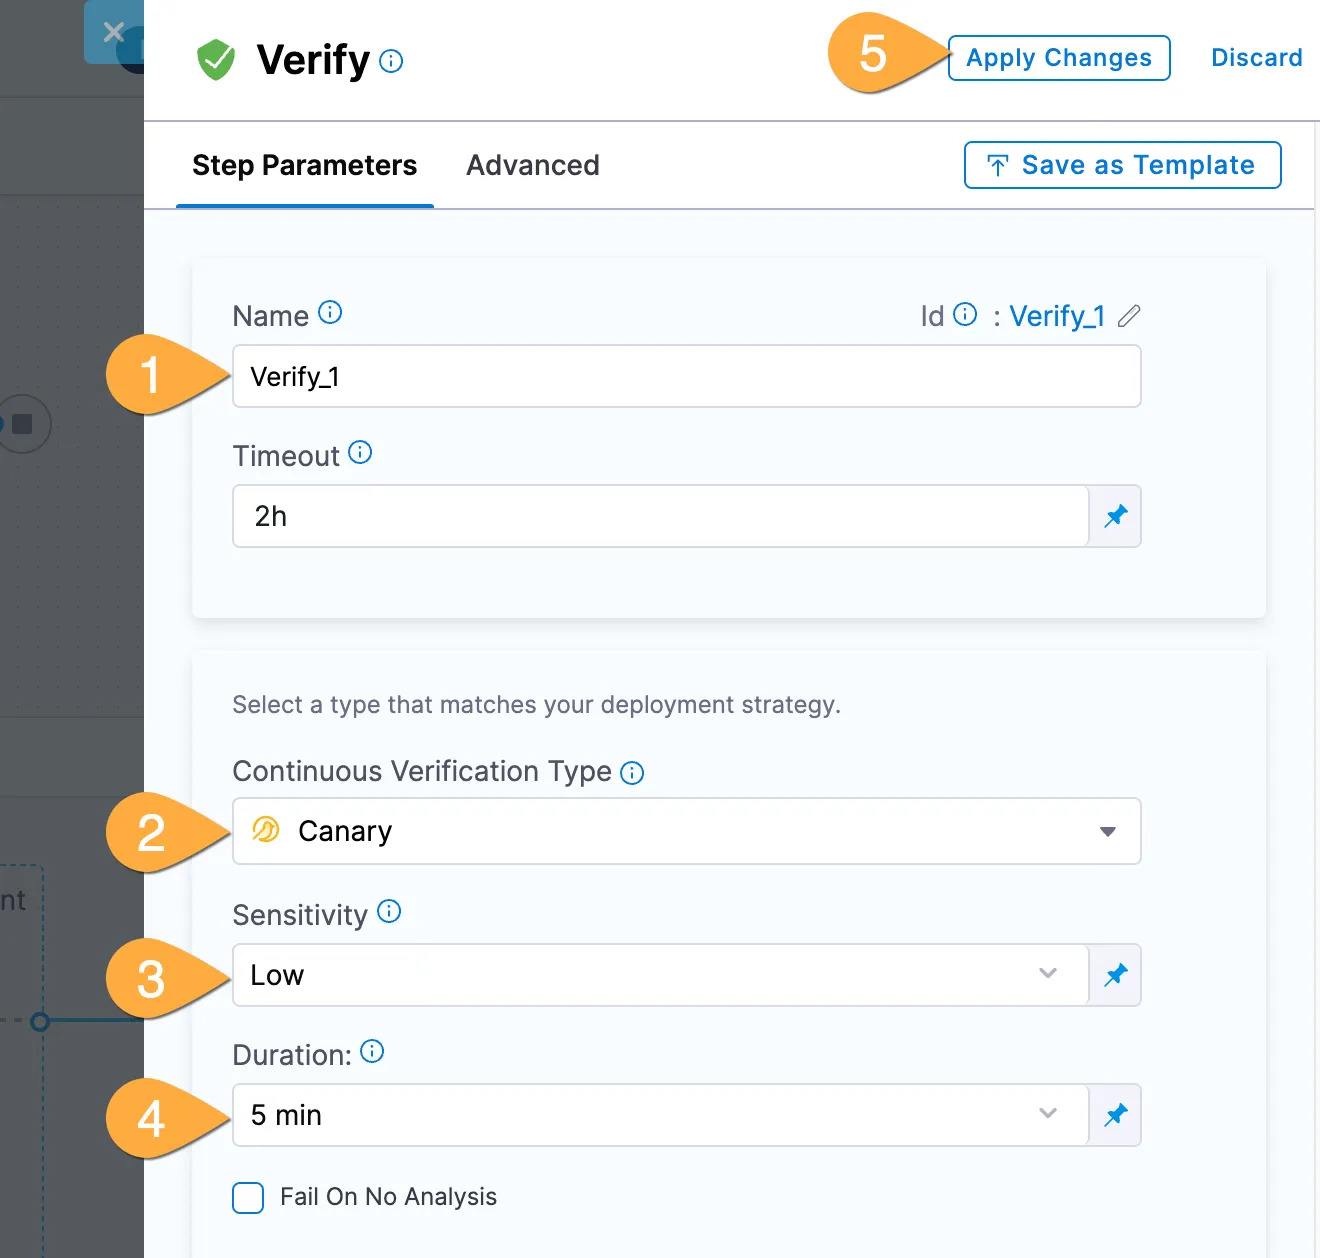
- In the verify pane: 1 name the step
Verify, 2 select Canary for Continuous Verification Type, 3 select Low for Sensitivity, 4 set Duration to 5mins, 5 click Apply Changes
- In the top right corner of Pipeline Studio: click Save, then Run.
Validate the release
- Hang tight until your pipeline reaches the “Verify” stage.
- Switch to your application tab, then in the Distribution Test section, click Start, then click the “play button”.
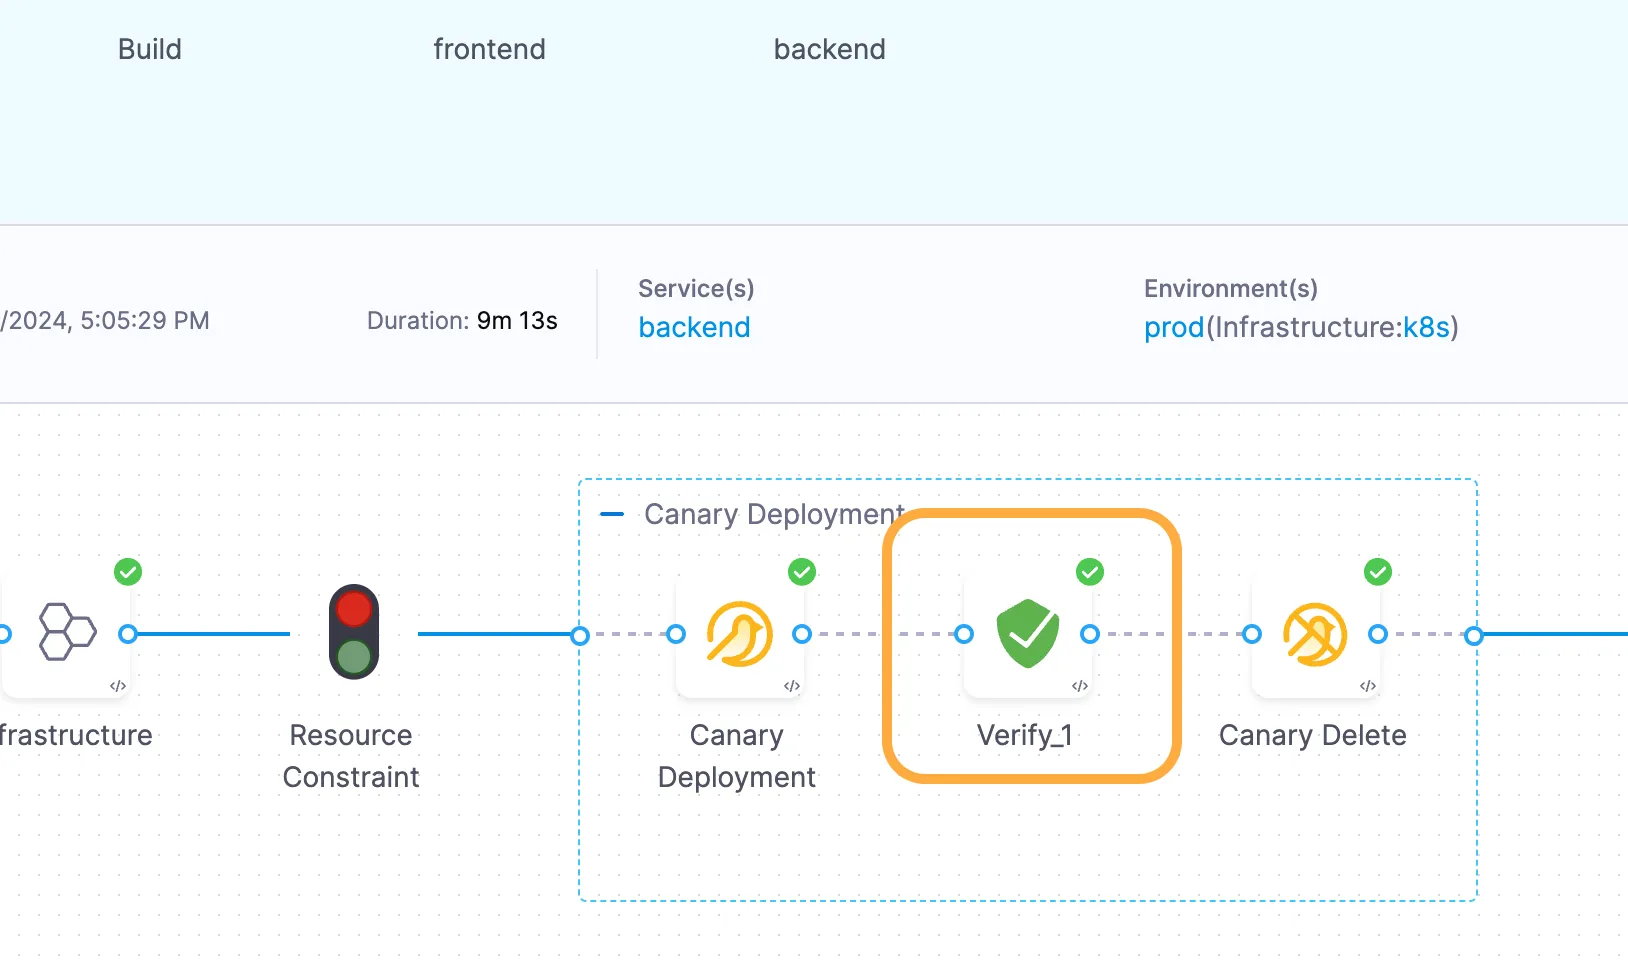
- After several minutes, check on the pipeline. The Verify step should be green!

