
2) Pre-flight Check
Environment setup
We’ll spin up a Dynatrace tenant and build an application together from scratch.
Please keep in mind that this is a “live-fire” experience. It’s instructor led- but can be more like white-water rafting than a museum tour.
click for Dynatrace “workshop outcomes reference”
Please let us know how it’s going with thumbs up reactions when it’s good sailing and chat/speak up if things are tipping over.
A) Dynatrace tenant setup
- Launch the Dyantrace trial page.
- Enter an email address and “Start free trial”.
- Follow the prompts.
- Check email (junk/spam folders!) for a “Welcome” message.
B) Cloud setup
- Dynatrace works natively across cloud providers. Follow the instructor prompts to connect to your selected environment.
- Once logged in check the section below matching your provider.
AWS
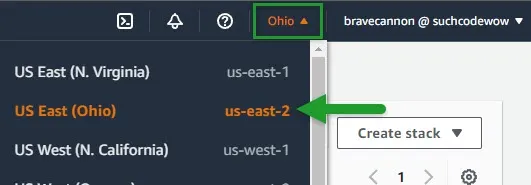
- In the top right bar, confirm the region is Ohio. If not, click the region and select “US EAST (OHIO)”
- You have full access to the various features of AWS. You could search for “Elastic Kubernetes Service” or “EC2”. Aside from a Cloudformation VPC, everything should be empty as we’ll build it all today.
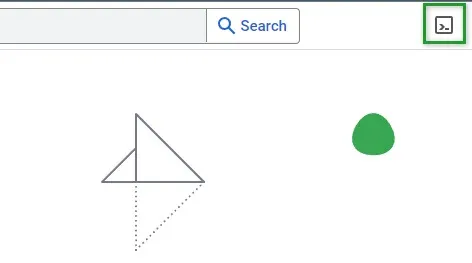
- in the top bar, open an AWS cloud shell session by clicking the shell icon.

- If the text is ridiculously tiny, there is a gear icon in the top right you can select to pick something other than “microscopic”.
AZURE
- Click the shell icon in the top bar of the Azure portal login.

- The setup steps should automatically connect you to the correct subscription.
- A resource group will be created for you during setup steps. You’ll have full access to all items in this group.
GCLOUD
- In your google cloud console, start a shell from the prompt icon top right.
- You have full access to the project in Google Cloud. Ensure you select your designated project during setup steps.
C) Setup
We’ll use Pepper today. It’s a cloud-agnostic deployment assistant built to help setup applications while providing every step along the way. (No magic whooosh then done!)
- In your cloud shell, download Pepper.
curl https://www.suchcodewow.io/manifests/pepper.ps1 > ~/pepper.ps1- Start Pepper with the
-coption to show commands as they run so you could use them manually later, and-noption to specify the existing VPC.
pwsh ./pepper.ps1 -cPepper will generate a running checklist of deployment items. Anything showing [-] is information, while anything with [>] shows the exact command you could run yourself with everything filled it.
- You should see something similar to below. Select any items marked
Required. The step that builds your kubernetes cluster takes some time across all cloud providers. (Some take more than others. sideways glance at AWS)
Option description current------ ----------- ------- 1 Switch Cloud Provider AWS us-east-2/bravecannon 2 Required: Create AWS ComponentsThe first line shows which cloud provider you’re using, the space within that cloud, and a unique identifier. If used in a local terminal with multiple available cloud providers, the option to switch cloud providers would let you switch between them.
Section Complete!
Congratulations, you’ve built an AWS cluster!
- Update the Workshop Tracker.