A) Azure Specific
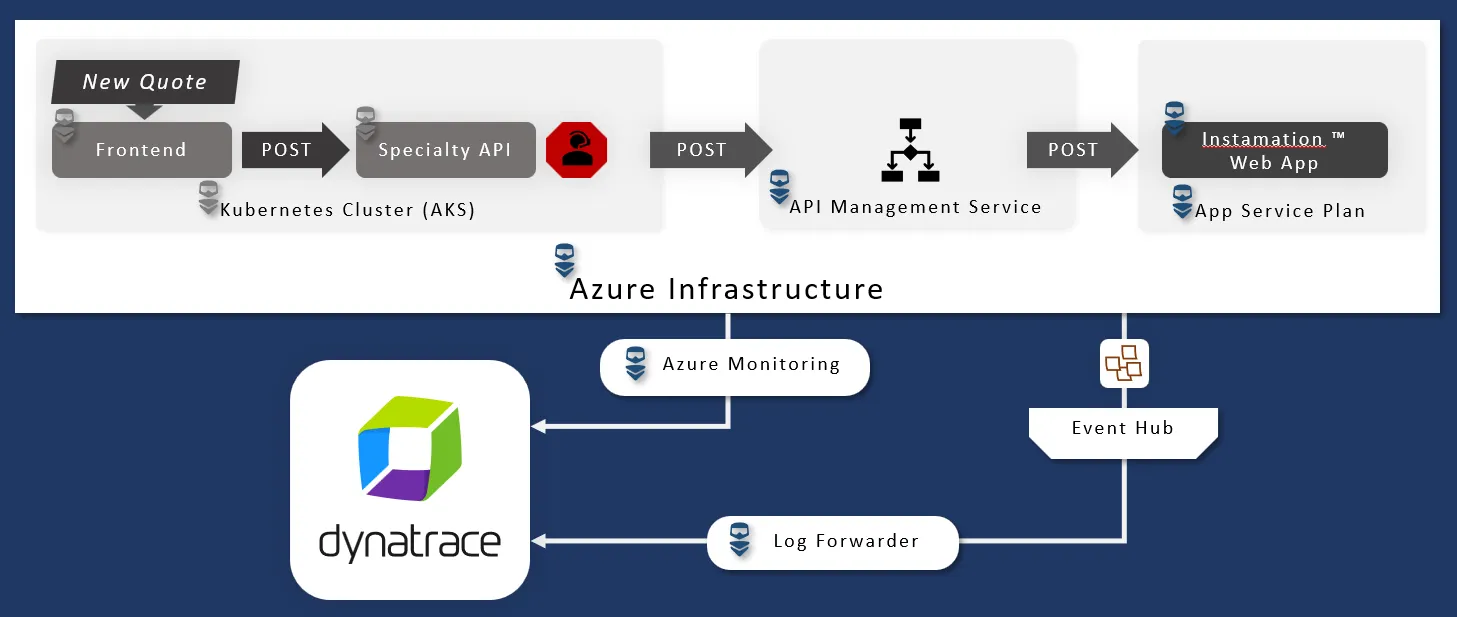
Instamation on Azure (Azure Web App)
Our company has instructed us to build and deploy a modern quoting service.
We’ve developed Instamation (tm) and chosen to deploy it as an Azure Web App for easy scalability and configuration.
Deploy
- In the Azure Console, go to “App Services.”
- Type your class id (sessionX#) into the filter top right.
- You should see just ONE web app and click to select. It will be in the format scw-webapp-[classname].
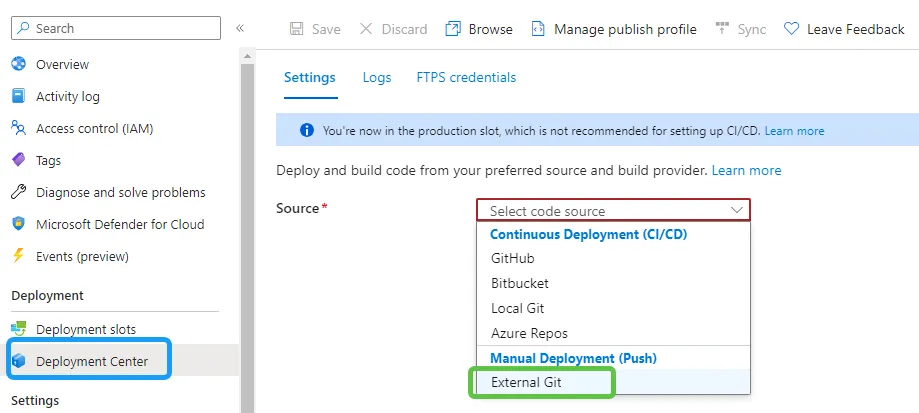
- Select the Deployment Center (blue highlight) then External Git as the source (green highlight).
- Copy the following service repository link into the repository field:
https://github.com/suchcodewow/instamationsvc- Type
mainfor the branch (blue highlight) then Save (green highlight).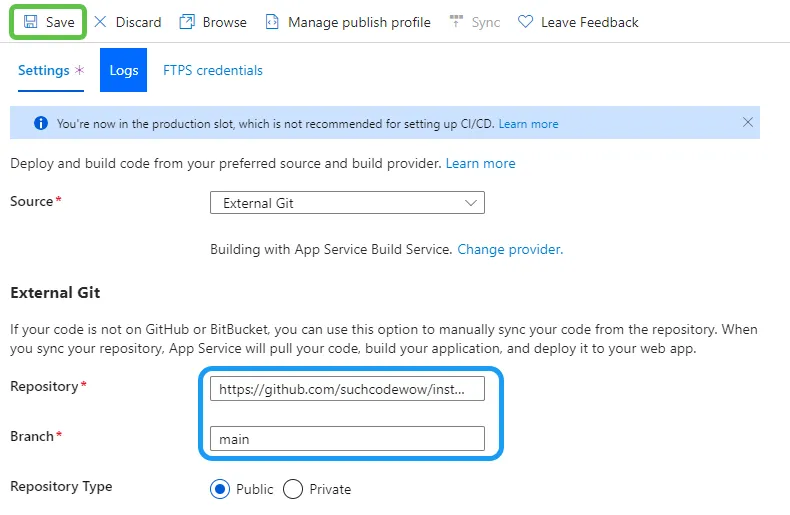
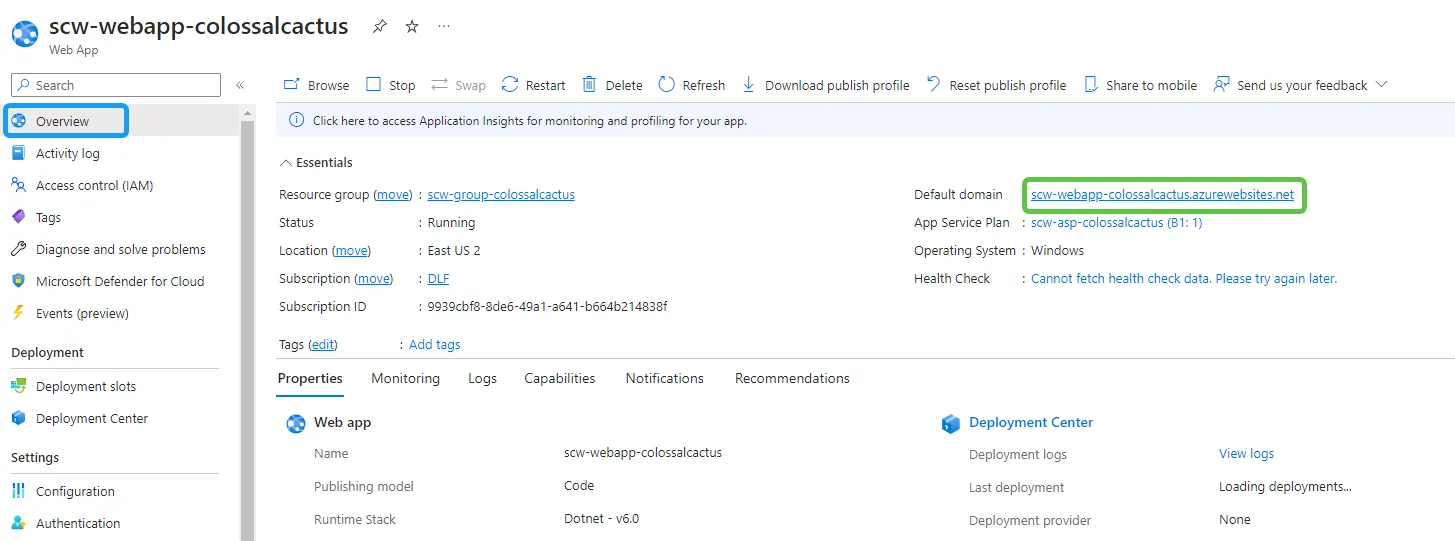
- Go back to the overview page (blue highlight) and click the default domain (green highlight) to see your new service.
- The deployment will likely take a minute or two. You might see a boilerplate message the first time you click- or it might not respond. When successfully deployed, you should see a simple json response simlar to:
{"status":"ready","appname":"scw-webapp-[classname]"}When this appears, it means your service is working! You are ready to move to the next step.
Dynatrace Extension
- In the inset-menu, click on Extensions within the Development Tools section.
- Click Add in the main window. Search/Find Dynatrace Oneagent and select it:
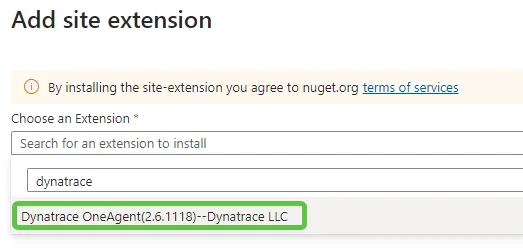
- At the bottom of the panel, check the agreement box, then click Add.
- Hang tight for a few seconds until it loads, then click the small browse box:

- Briefly switch to Tab #1. In Pepper, choose the option for
Dynatrace: Token Details. You might need to scroll up slightly to see the output. - Using the image below as a guide, fill in the environment ID, token, and then the server URL.
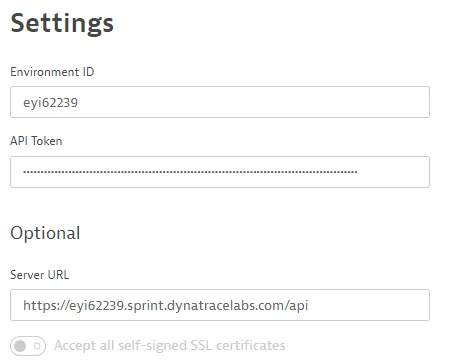
- Click Install OneAgent and hang tight until you see Enjoy monitoring from Dynatrace. at the top of the screen.
- In the Overview page of your web app, click the Restart button.
Dynabank & Azure Web App
- In Tab #6 showing the Instamation service API response, copy the URL from the address bar.
- In Dynabank, Log-in using any random name provided with the orange button top right.
- Click the orange button top right and click Operations.
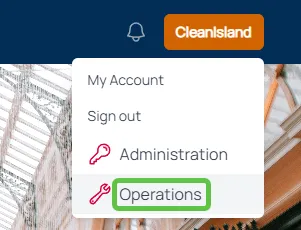
- In the Estimation Service URL box, paste in the URL of the Instamation service, then click save.
- Confirm it worked by checking for a successfully configured message. The App Name should reflect your user id (sessionX#). (The value is retrieved directly from your web service to make sure it worked.)

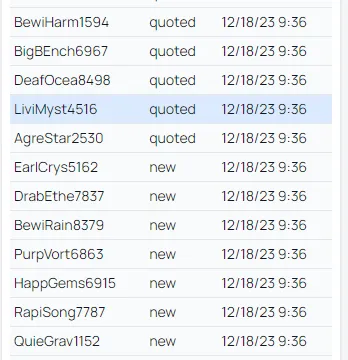
- New Collecticare quotes will now automatically by quoted by the Instamation Service. You can check on it by going to Administration:
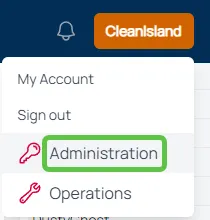
- Review new Collecticare quotes on the first administration panel. Instead of quotes showing up in the new state, they will show as quoted instead:
Diagnostic settings
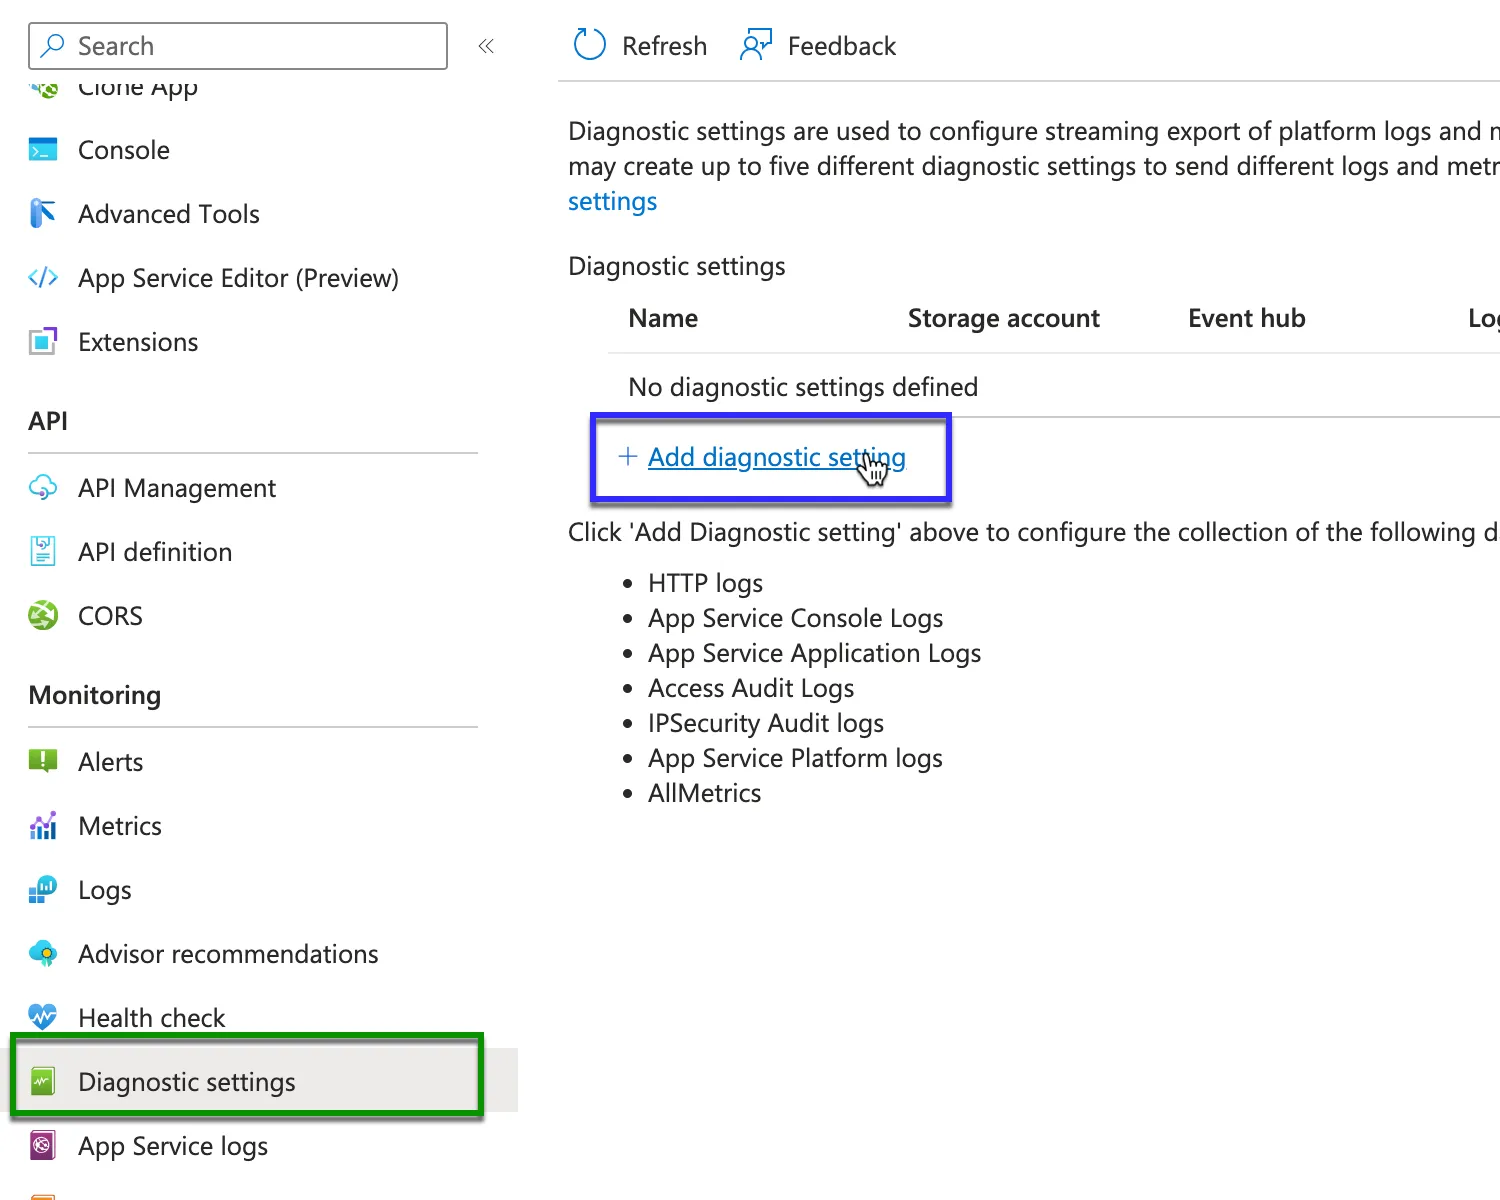
- Back in Tab #3, scroll down to diagnostic settings and click (green box).
- Click Add Diagnostic Setting.
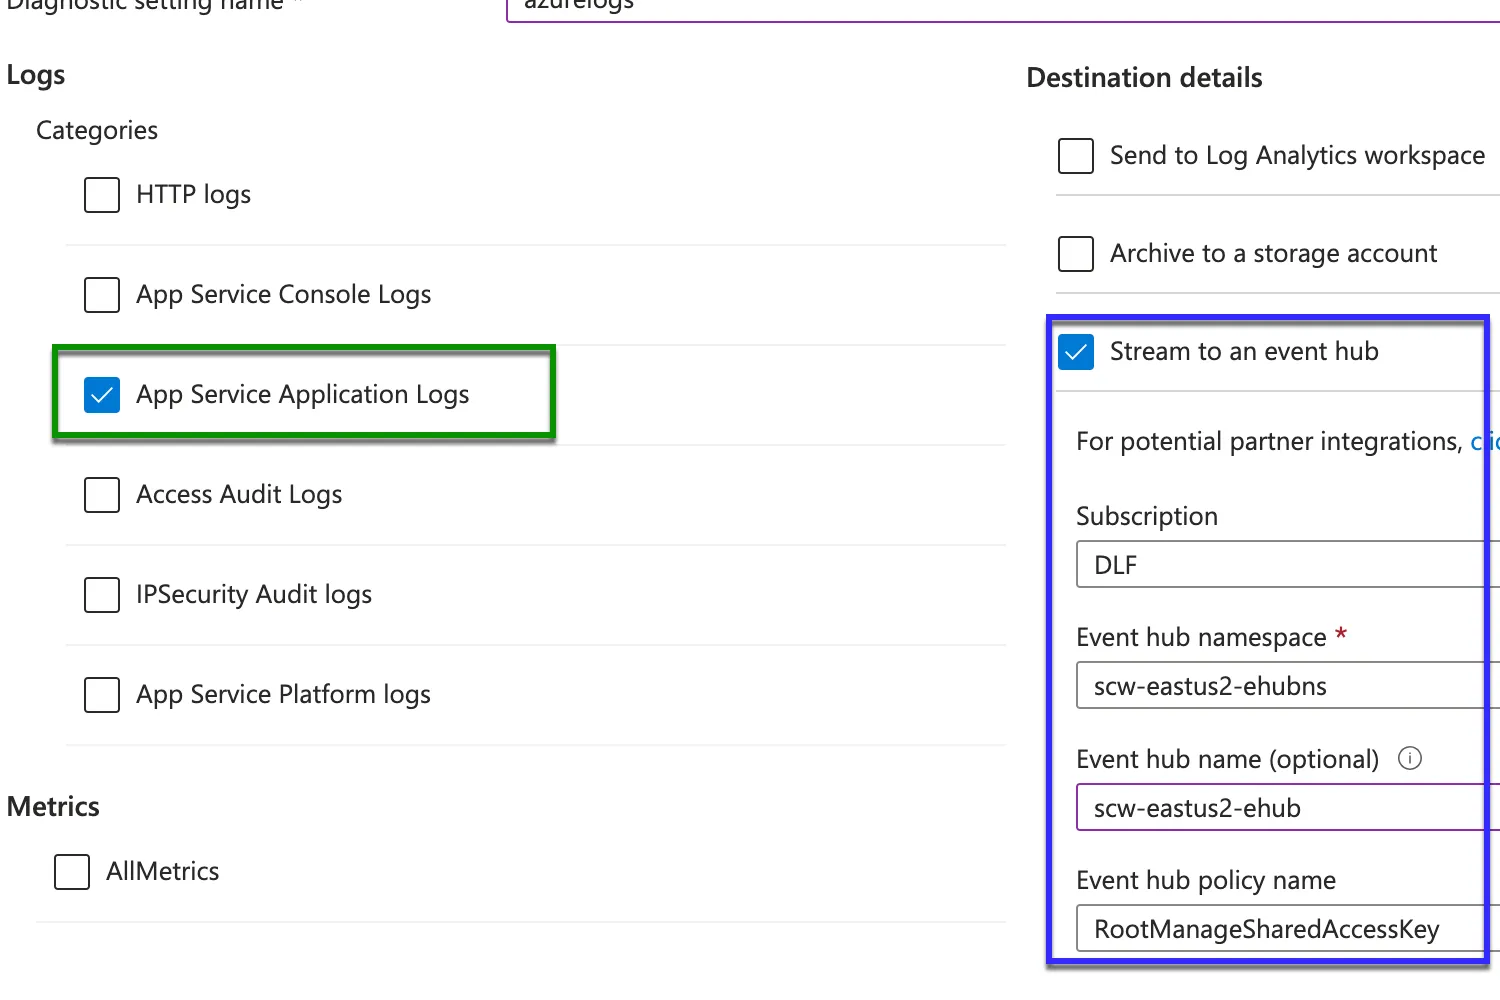
- Click App Service Application Logs (green box) and click Stream to Event Hub (blue box).
- Make sure the hub namespace matches below & select the shown event hub.
- Click save in the top left corner.
Hands On: API Mgmt
Deployment
Once the Dynabank business teams confirmed initial success of Instamation, our next goal is to configure it to use Azure API Management.
- In Tab #3 Azure Portal, search for ‘APIM’ and click on API Management services.
- Click on the APIM for your region in the format scw-[region]-apim.
- Click on API’s from the inset-left menu:
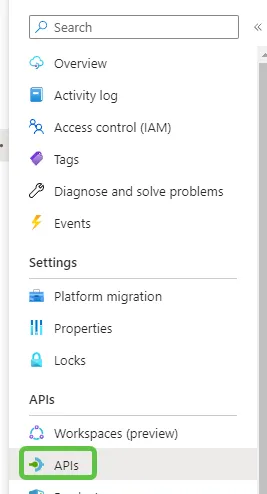
- And then click on App Service.
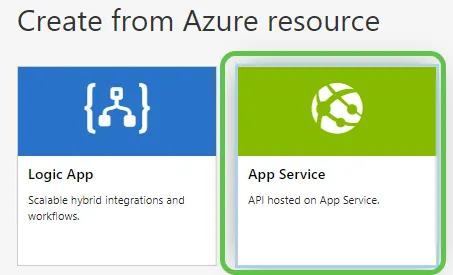
- Click the
Browesebutton. - Type in your id (sessionX#). You should see ONE matching App Service. Select the App Service & click select at the bottom.
- Copy the name provided into the API URL suffix box. Your Base URL should look something like:
https://scw-useast2-apim.azure-api.net/scw-webapp-colossalcactus- Click Create.
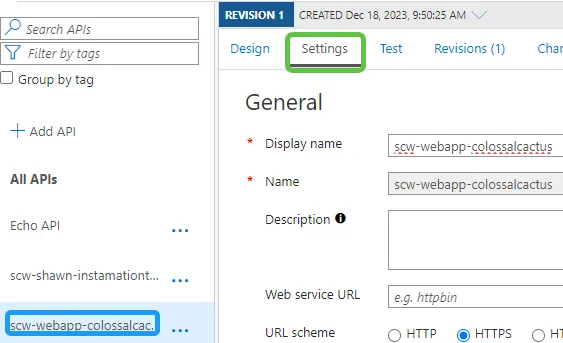
- Find your API in the list, click on it (blue highlight), and then click Settings at the top of the details box to the right (green highlight):
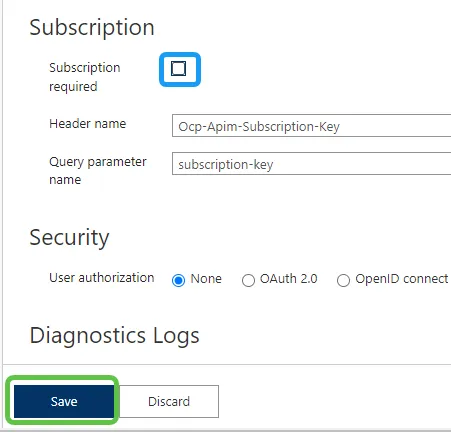
- Uncheck the Subscription required option box (blue highlight). Click Save (green highlight). This will allow all connections to reach your Instamation service.
- Before leaving this screen, find the Base URL of your service and copy it.
- Confirm it worked by pasting this URL into a new tab of your browser. You should see your service respond just fine behind the apim!
- In your Dynabank Operations portal (click orange button top right -> Operations), you can replace the Instamation Web App with the APIM version and click save. You should receive the same succesfully configured message.
Hands On: Azure Log Forwarder
With metrics and traces automatically ingested and baselined, our company wants to include logs as well. The Collecticare development teams use logs to write out critical business information like policy estimates and quoting decisions.
Deployment
- In Tab #1, run the Pepper command to retrieve Dynatrace token information.
- Drag-select all EXPORT commands shown. Right-click and copy. Press ENTER to quit Pepper.
- At the BASH command prompt, paste the EXPORT commands and press ENTER.
- Copy the Log Forwarder function below & paste it into the terminal window.
wget -q https://github.com/dynatrace-oss/dynatrace-azure-log-forwarder/releases/latest/download/dynatrace-azure-logs.sh -O dynatrace-azure-logs.sh && chmod +x ./dynatrace-azure-logs.sh \&& ./dynatrace-azure-logs.sh --deployment-name $DEPLOYMENT_NAME --target-url $TARGET_URL --target-api-token $TARGET_API_TOKEN --resource-group $RESOURCE_GROUP --event-hub-connection-string $EVENT_HUB_CONNECTION_STRING --require-valid-certificate true- It will take a few minutes to deploy all resources.
Hands On: Azure Monitor
Deployment: Service Principal
- On Tab #1 in the terminal, exit Pepper if it is running.
- Run the command below to generate a Service Principal/App Registration:
az ad sp create-for-rbac --name $DEPLOYMENT_NAME --role reader --scopes /subscriptions/9939cbf8-8de6-49a1-a641-b664b214838f --query "{ClientID:appId,TenantID:tenant,SecretKey:password}"- In Tab #4 Dynatrace, Open the Settings App —> Cloud and Virtualization —> Azure.
- Click on Connect New instance.
- Choose a name for the connection.
- Add the ClientID, SecretKey and TenantID that exported from the Terminal Command line /Azure CLI.
- Click Connect. That’s it!
- Open the Azure App in Dynatrace to see all resources.
Bonus Hands On: Grail!
Introduction
The deployment of Instamation by Dynabank after the Collecticare acquisition was a great success technical success.
With Dynatrace, we have full visibility into the entire quoting process and can see that quotes are fast and error free.
A big win!
Except that… the underwriting department is in a complete PANIC!
 The automated instamation quoting system has produced quotes for $1 on extremely expensive items that will cause serious financial problems for Dynabank.
We can easily double-check that all quotes work technically. What could be going on?
Logs and Business Events on Grail
With the Grail framework powering Log and Business Event ingestion, we can quickly dive into problems in business flows beyond technical issues.
- Download this Grail notebook template.
- On Tab #4 Dynatrace, open the Notebooks App.
- Click to create a new notebook.
- On the left inset panel, choose Upload.
- We’ll step through each example to see how Grail powers solutions beyond technical issues.
